Floral Design on a Card: Mastering Elegant Vector Frames and Seamless Patterns
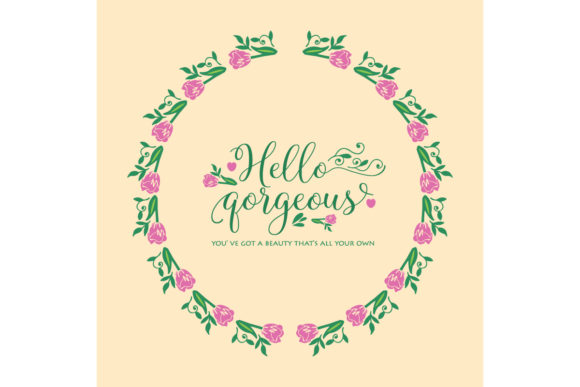
Creating an elegant "Hello Gorgeous" greeting requires more than just selecting a pretty flower; it demands a sophisticated understanding of composition, negative space, and vector scalability. When incorporating floral design on a card, the goal is to enhance the message without overwhelming it. Many creators, from freelance designers to small business owners, struggle with this balance. They often select assets that look beautiful in isolation but fail when applied to a specific layout. The difference between a professional-grade greeting card and an amateur project usually lies in how the botanical elements interact with typography and the overall canvas.
Understanding the technical and aesthetic nuances of seamless patterns and leaf frames is essential for high-quality print and digital results. A common pitfall is treating these elements as mere decoration rather than structural components of the design. By addressing frequent oversights early in your creative process, you can save time, reduce printing costs, and ensure your final product communicates the intended elegance effectively.
The Misunderstanding of Seamless Pattern Utility
One of the most frequent mistakes when working with floral design on a card is assuming that any seamless pattern will work as a background or border. In reality, many downloadable vector patterns are designed for textiles or large-format wrapping paper, not stationery. These patterns often have a repeat scale that is too dense or too chaotic for a standard 5x7 inch greeting card.
When a pattern is too busy, it competes directly with your "Hello Gorgeous" text. This reduces readability and creates visual fatigue. Instead of forcing a dense pattern to work, evaluate the visual weight of the asset before downloading or purchasing. Look for patterns specifically labeled for stationery or those with adjustable spacing. A better approach is to use a seamless pattern at reduced opacity (10-15%) or to mask it so it only appears in specific zones, such as the corners or edges. This preserves the botanical theme while maintaining ample white space for your message.
Evaluating Vector Quality Beyond Aesthetics
Not all vector illustrations are created equal. A significant oversight occurs when users judge a file solely by its thumbnail preview. You might find a stunning leaf and flower frame, but upon opening the file, discover it contains thousands of unnecessary anchor points or rasterized effects disguised as vectors. This bloats file sizes and causes rendering issues during printing.
Before committing to a floral asset, always check the following:
- Anchor Point Count: Excessive nodes indicate auto-tracing rather than hand-drawn illustration. Clean vectors should have smooth curves with minimal points.
- Layer Organization: Professional floral designs separate petals, leaves, and stems into distinct layers. Merged shapes make color customization nearly impossible.
- Scalability Test: Zoom in to 400% and out to 10%. True vectors remain crisp at both extremes. If edges pixelate or blur, it is likely a hybrid file unsuitable for high-resolution print.
Ignoring these technical checks leads to frustration later in the production pipeline. Taking two minutes to audit a file prevents hours of rework and ensures your elegant card design remains sharp across all formats.
Composition Errors with Leaf and Flower Frames
Framing is a powerful technique in floral design on a card, but it is easily mishandled. A common error is centering the frame perfectly and placing text directly in the middle. While symmetrical, this often feels static and dated. Modern elegance relies on dynamic tension and intentional asymmetry.
Another issue arises when the frame’s inner void does not accommodate standard typography hierarchy. If the opening is too narrow, you are forced to shrink your font size, making the "Hello Gorgeous" sentiment difficult to read. Conversely, if the void is too large, the text floats aimlessly. To avoid this, treat the frame as a flexible container. Use vector editing software to adjust the aspect ratio of the frame before setting your type. Alternatively, break the frame apart. Use individual sprigs or clusters to create a custom boundary that responds to your specific text length and alignment. This bespoke approach signals higher quality and thoughtful design.
Color Harmony and Print Safety
Vibrant screen colors often translate poorly to physical cardstock. Relying on default RGB swatches in floral vectors is a risky gamble. Neon greens and saturated magentas that pop on a monitor can print as muddy browns or dull purples. This discrepancy ruins the perceived value of the card.
Always convert floral assets to CMYK or Pantone spot colors early in the design phase. Furthermore, consider the paper stock. Uncoated papers absorb ink, darkening colors and reducing contrast. Coated stocks maintain vibrancy but can make dark floral frames feel heavy. Test your color palette against your intended substrate. For an elegant aesthetic, desaturating floral elements slightly often yields a more refined, timeless result than using full-spectrum saturation. Muted tones also provide better contrast for dark text, improving accessibility and legibility.
Licensing and Commercial Viability
For entrepreneurs and marketers, overlooking licensing terms is a critical business risk. Many free or low-cost floral vectors restrict commercial use or require attribution that clashes with premium branding. Using a restricted asset on a product for sale can lead to legal complications and reputational damage.
Read the license agreement thoroughly. Specifically, look for clauses regarding:
- End Product Definition: Does the license cover physical greeting cards, digital downloads, or both?
- Modification Requirements: Some licenses require significant alteration before the asset can be used commercially.
- Print Run Limits: Certain tiers cap the number of units you can produce before requiring an extended license.
Budgeting for proper commercial licenses upfront is far cheaper than retrofitting a design or facing infringement claims. View licensing as an investment in your brand’s integrity and longevity.
Practical Workflow for Better Results
Achieving elegance in floral design on a card requires a disciplined workflow. Start with the message, not the flowers. Determine the tone of "Hello Gorgeous"—is it playful, romantic, or formal? Select botanical styles that match this sentiment. Delicate line art suits minimalist elegance, while lush watercolors convey warmth and abundance.
Create a mockup template at actual print size before finalizing any purchases or downloads. Place sample text and test various frame configurations. This practical step reveals spatial issues that thumbnails hide. When applying seamless patterns, use blending modes like Multiply or Overlay to integrate them naturally with textured backgrounds rather than letting them sit flatly on top.
Finally, seek feedback from your target audience, not just fellow designers. Non-designers notice readability and emotional impact first. If they comment that the flowers are "pretty" but miss the message, simplify the arrangement. Effective floral design serves the communication; it never replaces it. By prioritizing usability, technical accuracy, and appropriate aesthetics, you transform generic botanical assets into distinctive, professional-grade greeting cards that resonate with recipients and reflect positively on your brand.